 The system can automatically generate an electronic newsletter that is personalized to each member of your group.
This can be scheduled to go out once a week, every other week, or every four weeks.
Your newsletter can contain:
- Current announcements
- Upcoming campouts, meetings and other events, with the sign-up status of each family member
- Training that is about to expire
- Equipment checked out to family members
- Library materials checked out to family members
- Account balances
- Recent transaction history
Set Up Your Newsletter

Set up your group's newsletter by going to Communication → Set Up Automated Newsletter. You must be a Site Administrator to have access to this page, or have a role that is authorized for "Maintain Newsletter Settings".
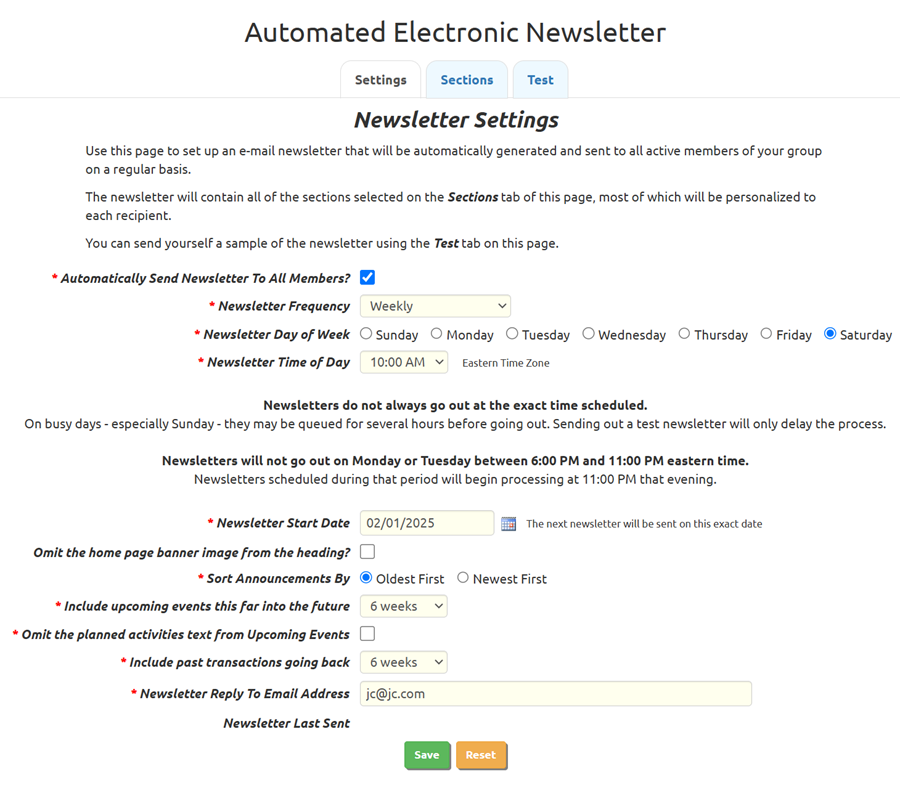
As shown above, this allows you to set various options that will control when your newsletter is sent and what it will contain.
The first checkbox, Automatically Send Newsletter To All Members?, turns the newsletter function on or off for your group.
The Newsletter Frequency determines how often the newsletter will be produced.
The Day of Week and Time of Day control when the newsletter will be produced. Note that the time of day is in the Eastern Time Zone.
The Newsletter Start Date is the first day you want the newsletter to be sent. If you want to change the schedule of your newsletter, be sure to set this to the next date it should be produced.
If you have uploaded a large banner image to the home page of your site and do NOT want this image to appear at the top of every newsletter, put a checkmark next to Omit the home page banner image from the heading?
Include upcoming events this far into the future will determine the number of events and meetings that are included in each newsletter.
If your event planners enter lengthy amounts of information to the Planned Activities when they add events to the calendar, you may want to consider checking the Omit the planned activities text from Upcoming Events option to reduce the overall size of the newsletter.
Include past transaction going back controls the section that lists recent monetary transactions for the current recipient.
When members of your group reply to the newsletter, their reply will go to the address specified in Newsletter Reply To Email Address.
Click Save or click on one of the other tabs to save your choices.
Sections
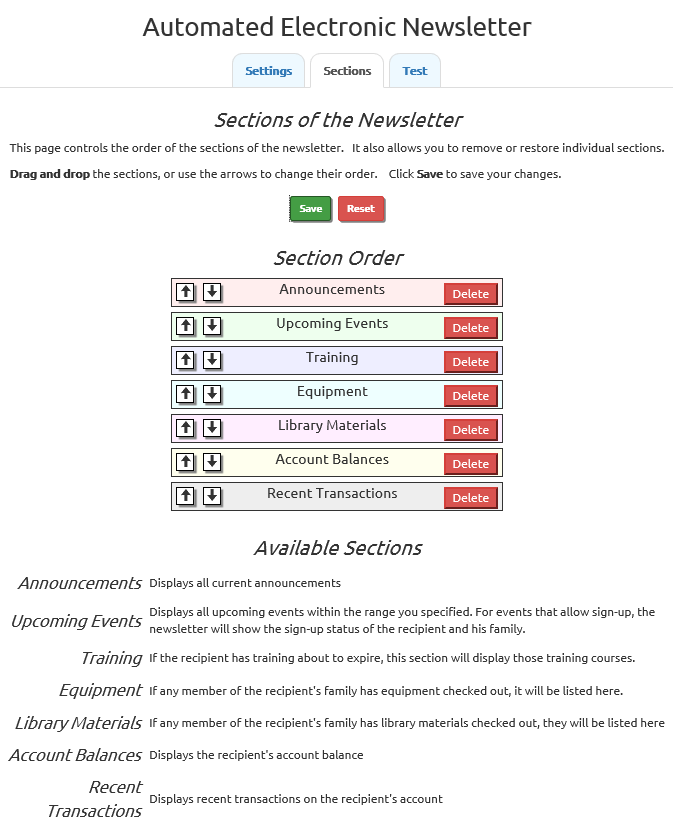
You can further customize your newsletter by clicking on the Settings tab. This will bring up a page that looks like this:

You can change the order of the sections by dragging a section to a different position on the list. You can also use the arrow keys to move the sections one position at a time.
Use the Delete button to remove a section.
Click Add Section to add a section that was previously removed. This button will only appear if you don't have all of the available sections included.
At the bottom of the page you'll find a description of each section.
Trial Run
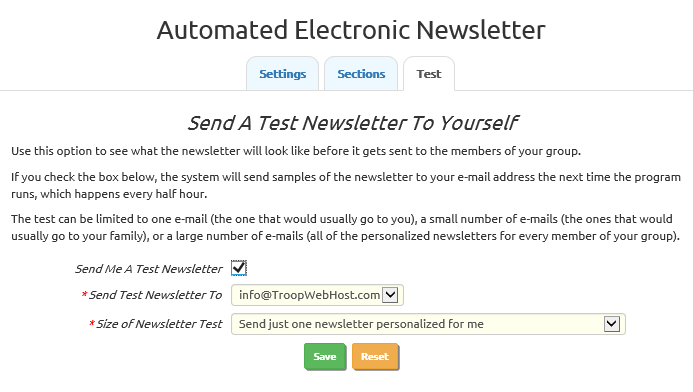
Click the Test tab to set up a trial run so you can see how the newsletter will appear when it goes out to your group.

The newsletter program runs once an hour. If you check the Send Me A Test Newsletter box, it will send a set of newsletters to your primary e-mail address the next time it runs. It will uncheck the box after it completes the trial run.
The Size of Newsletter Test option determines the number of newsletters to be included in the test:
- One newsletter personalized for you, or
- One newsletter for each member of your family, or
- One newsletter for each member of the group
You must click Save to initiate the test run.
Opting Out

Any member of your group who does not want to receive the newsletter may opt out by going to My Stuff → My Contact Information and checking the checkbox below the e-mail addresses.
Newsletter Output

This sample will give you an idea of how your newsletter might appear.
If your group has created a banner image for your web site, that image will be displayed at the top of the newsletter.
There will be a link to your group's web site at the top of the page.
It then shows each section of the newsletter, in the order that you specified on the Sections tab.
The newsletter is designed to look good on a smart phone, but it will also display nicely on a large screen.