 Many groups hold fundraisers
to support their activities.
Some sell candy door to door, others hold bake sales and garage sales, and some even sell Christmas trees.
Each of these fundraising activities should be entered as an Event on your calendar.
You can then post expenses and income to that event.
When you have everything tallied, you can distribute the proceeds to your members if that is your policy, or retain the funds for use by the group as a whole.
Create The Event
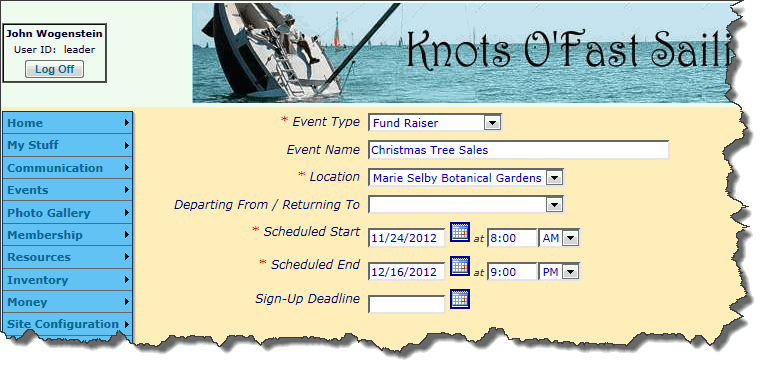
Go to Activities → Add & Update Events to create the Event record for your fundraiser.
If you do not have access to this function, ask your site administrator to post this information for you.
As shown above, the Event Type should be set to Fund Raiser.
For one day events, the Scheduled Start and Scheduled End times should be just that.
For fundraisers that span several weeks - like Christmas Tree Sales - you could have the Scheduled Start be the opening day and the Scheduled End be the final day.
This will cause the event to show up on your calendar every day between those two dates.
If that's not to your liking, you could just set both dates to be the final day of the fundraising event.
If you take that approach, you might want to set the description to something like Christmas Trees - Final Day To Report Sales.
Enter Income
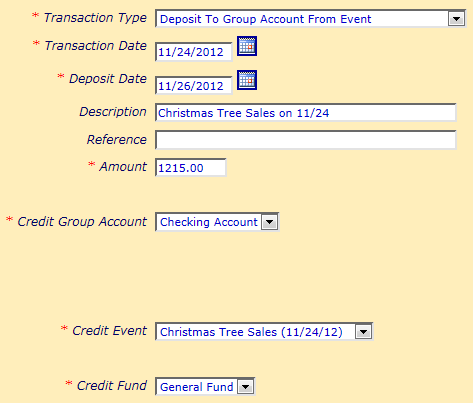
As the money rolls in, record your bank deposits using the Deposit To Group Account From Event transaction type.
The Deposit Date should be the day you made the deposit, so it matches your bank statement.
Select the fundraiser as the Credit Event, as shown at right.
Enter Expenses
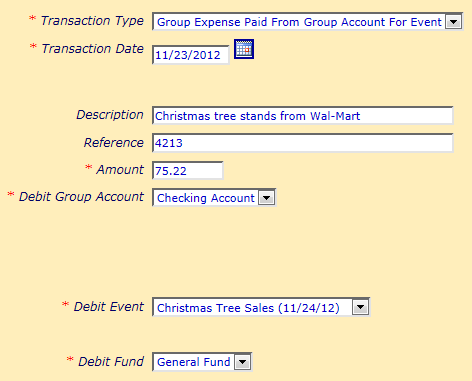
The expenses you incur for a fundraiser should be posted to that event.
Choose one of these transaction types for the expenses:
- Group Expense Paid From Group Account For Event if the expense was paid for directly from a group account
- Group Expense Paid By Member For Event if an individual member paid for it and wanted it credited to his account
Be sure to select the fundraising event as the Debit Event.
View Your Net Profit
After you've recorded all of the income and expenses for this fundraiser, it's time to see what you made.
Go to Money → Event Balances to view a list of all events. Click View Details for your fundraiser to view a page like the one shown below.
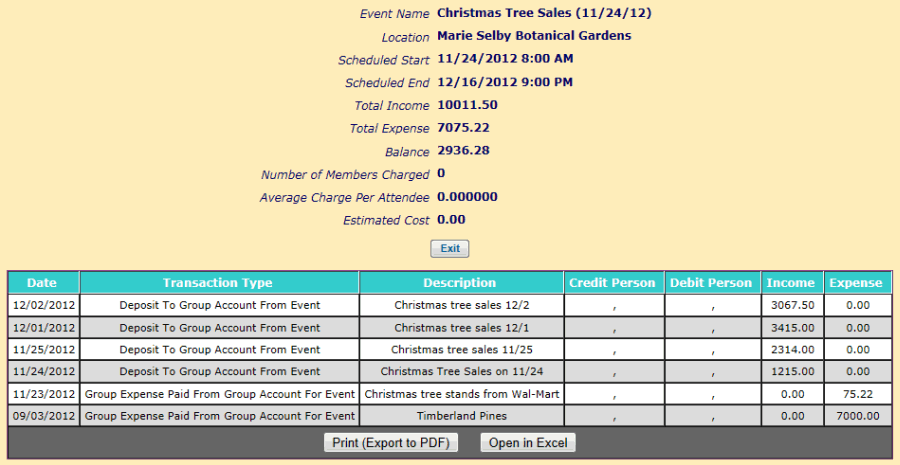
You should see all of the income and expenses in the grid at the bottom of the page. Verify that nothing is missing.
The summary at the top of the page shows you the Total Income and Total Expense for the fundraiser.
The Balance is your net profit.
Distribute The Proceeds
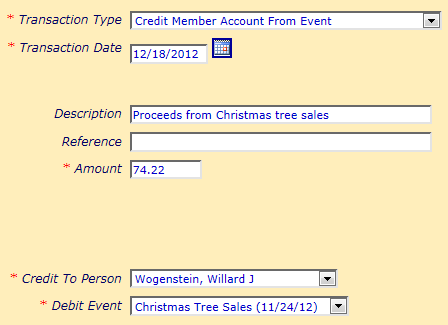
If you plan to distribute some or all of the profits from the fundraiser to members of your group, do so using the Credit Member Account From Event transaction type.
This will increase the balance of that member's account.
If the amount is different for each group member - which could be the case if you base your distribution on number of hours worked or total sales - you will need to enter individual transactions as shown at right.
If the same amount is being distributed to all participants, you can easily enter all of the distributions at once by entering a Group Transaction.